RECIPES
There Are So Many Recipes Using Chile Peppers, Where Do I Start?!
You’ve discovered where to enjoy the best Premium Roasted Green Chili Recipes. Here’s all the inspiration you’ll need in these over 150 recipes to experience Mi Abuelo Organic Green Chili Peppers for breakfast, lunch, dinner, snacks and party appetizers.
What else can you use green chiles for in addition to traditional Mexican dishes? Try these!
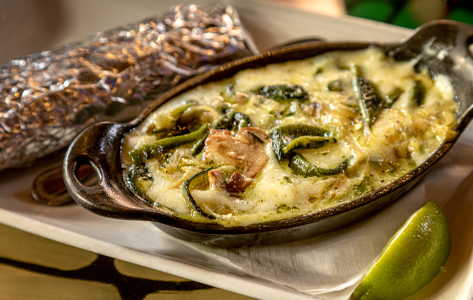
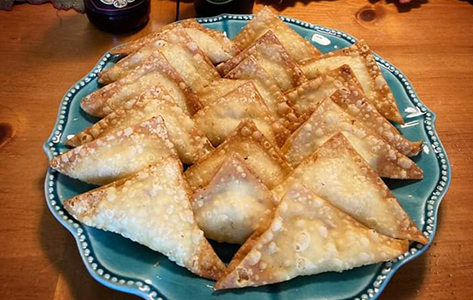
Create Savory Appetizers & Dips Like Fundido, Hummus, Chile Con Queso, Salsa, & Cream Cheese Wantons.
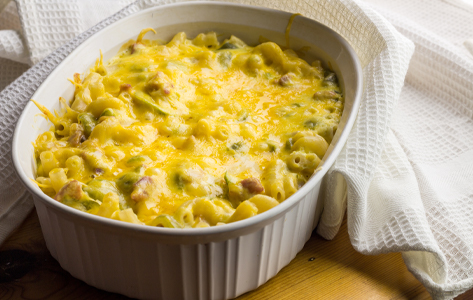
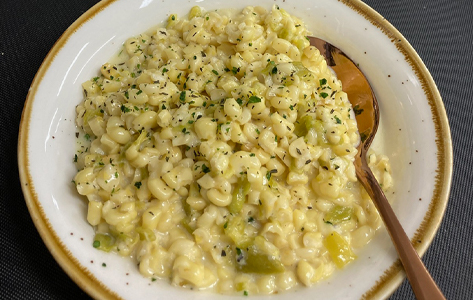
Renew Dishes Like Mac-N-Cheese, Cauliflower Mash, Mashed Potatoes, Green Bean Casseroles, & Creamed Corn.
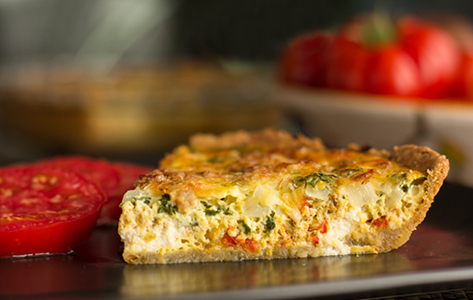
Spice Up Your Mornings With Green Chile In Quiches, Omelets, Scrambled Eggs, Chickpea Pancakes, & Biscuits & Gravy.

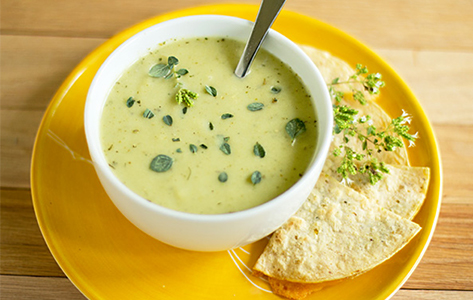
Expand Your Main Go-To Recipes With Delectable Cream Style Gravies, Soups, Stews, & Bisques.
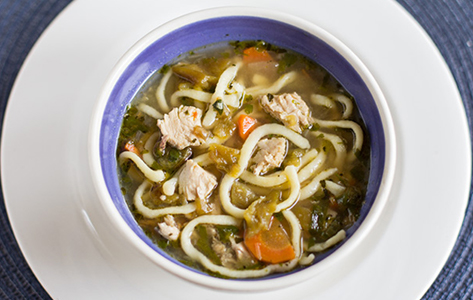
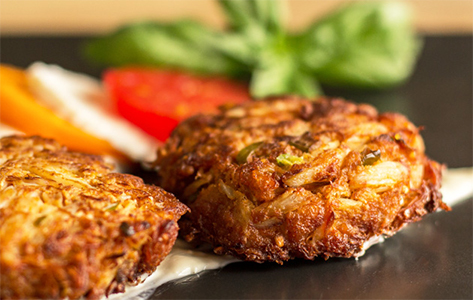
Indulge Your Taste Buds By Incorporating Green Chile In Crab Cakes, Pizza, Chicken Alfredo, & Lasagna.
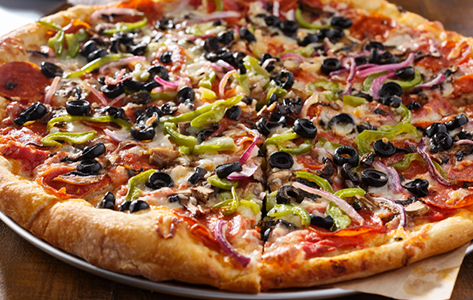
Download the Pinterest App to fall in love with a whole new collection of recipes that are sure to put a smile on every family members face. Weekend get togethers will leave everyone raving about who brought the green chile to the party!
Cooking Tip: Be Sure To Remove The Skins Prior To Use. Once Thawed Chiles’ Will Remain Foodsafe In Your Refrigerator For 5 Days.

New Mexican Chicken Enchiladas with Mi Abuelo™ Green Chile Peppers
These chicken enchiladas are made with shredded chicken, Mi Abuleo™ Flame-Roasted Organic Green Chiles and plenty of cheese, all rolled up in corn tortillas and smothered with green chile sauce. This enchilada recipe is sure to become a family favorite!
You’ll find that making enchiladas from scratch at home is actually quite easy to do, especially using Mi Abuelos Chiles. These green chicken enchiladas taste like they came from a New Mexican restaurant.
Prep: 10 Minutes
Cook: 10 Minutes
Servings: 6
Ingredients for the Chicken and Sauce:
• 1 (3½ lb.) Chicken, with the neck, but giblets removed
• 1 Small carrot (3 oz.)
• 1 large white onion (10 oz.)
• 1⁄2 Teaspoon cumin seed
• 2 Tablespoons unsalted butter
• 2 Cups diced white onion
• 4 Garlic cloves, minced
• 2 Tablespoons all-purpose flour
• 3 Cups Mi Abuelo™ Flame-Roasted Green Organic Chile Peppers, skins peeled and chopped
• 6 Cups hot chicken broth (see below)
• Salt and pepper to taste
• 1⁄4 Teaspoon dried Mexican oregano
• 12 Soft corn tortillas Enchiladas and Garnish:
• 2½ Cups (7 oz.) Oaxacan or Monterey Jack cheese, or a mix, grated.
• 2 Cups (10 oz.) queso fresco, crumbled
• 4 Scallions, thinly sliced (3/4 cup)
• 1 Cup coarsely chopped cilantro leaves and tender stems (from about 1 bunch)
• Crema, crème fraîche, or sour cream
Instructions For Making chicken:
1. In a large pot or Dutch oven, add the chicken, chicken neck and enough water just to cover. Add the carrot, onion, and garlic cloves and bring to a simmer. Let simmer until the meat is cooked through and the broth is flavorful, about 40 minutes.
2. Next strain, reserving both the broth and the chicken.
3. Set chicken aside until cool enough to handle. Shred the meat and discard the bones and skin. You should end up with approximately 4 cups of meat. Set aside. Reserve 6 cups of broth for making the sauce, plus 2 cups more for softening tortillas.
Instructions For Making Sauce:
1. In a small, dry skillet over medium-high heat, add the cumin. Cook, stirring or shaking the pan occasionally, until fragrant, about 3 minutes. Remove, then finely grind.
2. In a large saucepan over medium-high heat, melt the butter. Once hot, add the onions and cook, stirring occasionally, until softened and barely colored, about 8 minutes. Stir in the minced garlic and let cook 1 minute, then sprinkle the flour into the pan and stir to incorporate. Add the chiles.
3. Season generously with salt and lightly with black pepper, then add the cumin and oregano; stir well. Gradually whisk in the chicken broth and bring to a simmer. Simmer for 10 minutes (sauce should thicken slightly). Taste and adjust the seasoning as needed, then set aside.
Cook’s Tip: Sauce and chicken can be prepared up to 1-day ahead. Cover and refrigerate.
Instructions For Making Enchiladas:
1. Preheat the oven to 400° F. Ladle 1½ cups of the sauce into a standard 9-by-13-inch glass baking dish. Heat the remaining chicken broth.
2. Steam tortillas until softened slightly so they can be rolled without breaking, dip them very briefly in the hot broth, or (Traditionally, tortillas are lightly fried to soften.)
3. Working one at a time, distribute about 3 tablespoons of the shredded chicken down the center of each tortilla. Roll the tortilla loosely into a cigar shape to cover the filling, then transfer seam side down to the prepared baking dish. Repeat with the remaining tortillas and chicken, placing the enchiladas snugly side by side. Ladle the remaining sauce over the top to coat generously.
4. Sprinkle the cheese generously on top of the sauce, cover with foil and bake until the enchiladas are heated through and the sauce is beginning to bubble, about 20 minutes. Remove the foil and bake until the top is browned and bubbling, 15-20 minutes more.
5. Remove the enchiladas and sprinkle with the queso fresco, scallions, and cilantro.
6. Divide among 6 individual plates and drizzle or dollop each portion generously with crema or sour cream. Garnish with tomato and parsley.
Serve immediately.
New Mexican Chicken Enchiladas with Mi Abuelo™ Green Chile Peppers Recipe
New Mexican Chicken Enchiladas with Mi Abuelo™ Green Chile Peppers Printable PDF
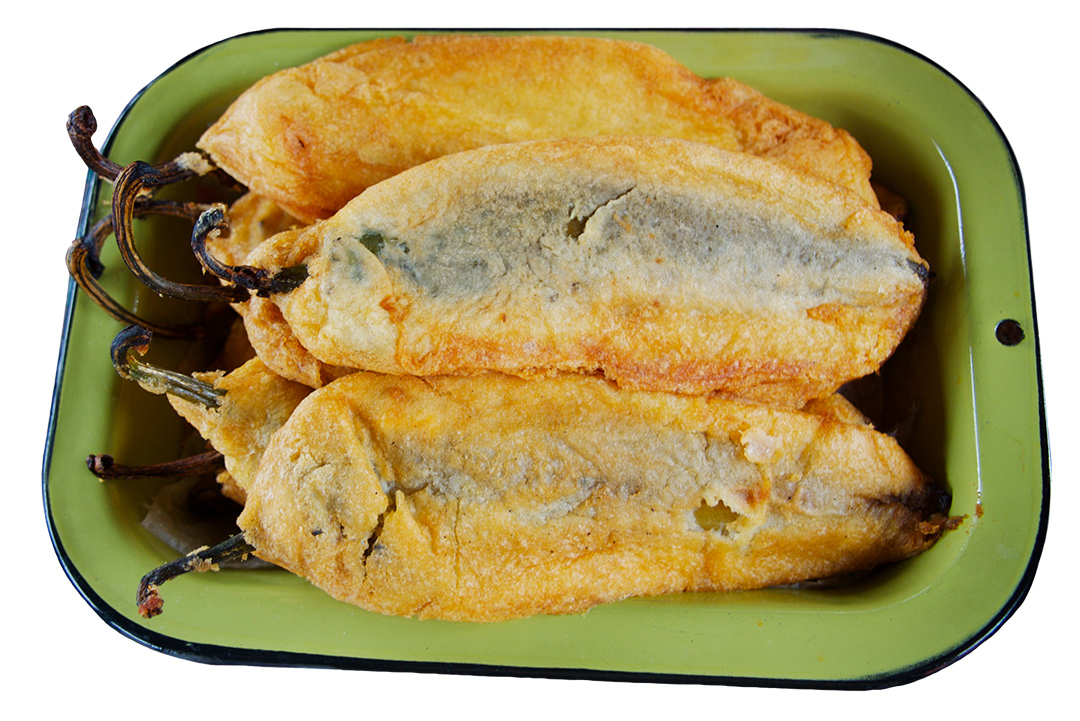

Classic Green Chile Rellenos with Mi Abuelo™ Green Chile Peppers
This classic meal is made totally authentic with “New Mexican Mi Abuelo Chiles.”
Chiles Rellenos, Spanish for “stuffed peppers,” is a Mexican dish made of roasted chiles stuffed with cheese, dipped in an egg batter and fried until golden, with a filling consisting of only cheese.
(A perfect meal for vegetarians or people who just love cheesy chiles!)
Prep: 20 Minutes
Cook: 20 Minutes
Servings: 4
Ingredients:
• 8 Mi Abuelo Organic Chile Peppers (Approx. 1-14 oz. package)
• 8 Ounce block of Asadero Cheese (Cut in 1/2” x 1/2” x 3” strips)
• 2 Large eggs
• ¾ Cup of flour
• 1 Teaspoon Salt
• 1 Teaspoon Pepper
• 1 Cup of Olive oil
Cook’s Tip: A typical variation includes adding refried beans prior to rolling in warm tortillas.
Cook’s Tip: Stuffing can include ground beef, pork, turkey, potato, or cheese, but can also include sweet ingredients such as raisins and nuts.
Instructions:
1. Rinse roasted chile under cold water to peel off the skins, leave the stems on to aid in handling while frying. Cut a 3/4” lengthwise slit just below the stem of each pepper. Slide 2 strips of Asadero cheese into the slits previously cut (strips of onions alongside cheese are optional). If the chile tears while stuffing just fold the chile back over itself to conceal the cheese. Set aside on paper towel covered plate to drain.
2. Spread out ¾ cup of flour mixed with 1/2 teaspoon. Salt and 1/2 teaspoon pepper across a plate or cutting board. Roll each stuffed chile to completely coat with the flour mixture. Shake off any excess flour from chile and set aside on a plate or cutting board.
3. Heat a 10” frying pan filled to a depth of ¼” with olive oil over medium high heat.
4. Separate yolks from egg whites, beat yolks with 1/2 teaspoon of salt and 1/2 teaspoon pepper. set aside to use later. In a second bowl, beat the egg whites with an electric mixer until the whites form stiff peaks. Fold in egg yolks with salt and pepper.
5. Test the heat of the oil by dripping a drop of egg mixture into it. If the oil is hot enough it will bubble and float to the top of the oil, if it sinks and does not bubble adjust the heat higher if the heat is too hot the oil will splatter out of the pan (turn down accordingly.)
6. Take each chile and dredge them one at a time in the egg mixture. Immediately transfer each chile from the egg mixture to the hot oil and cook until golden brown, turning once. Remove golden brown rellenos to drain on paper towel covered plate.
Allow to cool till warm and serve rolled in warm flour tortillas.
Classic Green Chile Rellenos with Mi Abuelo™ Green Chile Peppers Recipe
Classic Green Chile Rellenos with Mi Abuelo™ Green Chile Peppers Printable PDF
Whether you’re seeking to create a new recipe or spice up an old one, Mi Abuelo™ Flame-Roasted Organic Chili Peppers can help you obtain the best flavors from the meals you prepare.
You’ve (presumably!) been thinking about delicious Mexican cuisine this whole week and wanting to try chile peppers—we’ve got you. One of the highlights of Mexican cuisine is its diversity by using chile peppers.
Explore a spectrum of flavorful trends through a step-by-step approach with recipes recreating authentic flavors of Mexican cuisine in your home kitchen. Adjust the amount of chile spiciness in the recipe according to your own heat index.
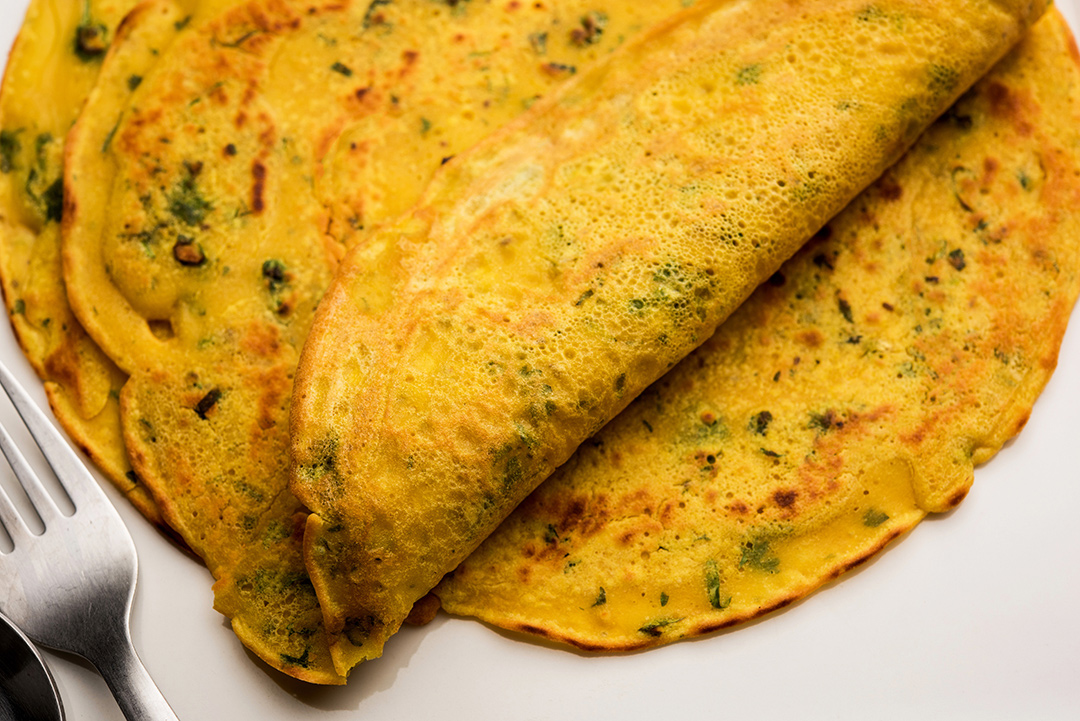

New Mexican Grande Chickpea Pancakes with Mi Abuelo™ Green Chile Peppers
This dense and filling savory New Mexican-style chickpea pancake is packed with protein and fiber. As a huge breakfast pancake, it’s about the size of a 10-inch skillet! Be sure to use an extra-large round plate because it won’t fit on a regular round plate. It’s a quick and spicy breakfast that’s tasty and takes only 10 minutes to whisk together the ingredients and then another 10 minutes or so to cook.
Prep: 10 Minutes
Cook: 10 Minutes
Servings: 1 Large or 2 Small Pancakes
Ingredients:
• 1 Green onion, finely chopped (about 1/4 cup)
• 1/4 – 1/2 Cup Mi Abuelo™ Green or Red Chiles, chopped
• 1/2 Cup chickpea flour (also known as garbanzo flour)
• 1/4 Teaspoon baking powder
• 1/2 Cup + 2 tablespoons water
• 1/4 Teaspoon garlic powder
• 1/4 Teaspoon fine grain sea salt
• 1/8 Teaspoon black pepper, freshly ground
• Pinch red pepper flakes (optional)
Cook’s Tip: Chickpea flour makes this pancake very dense and filling top with avocado, hummus, red pepper flakes, and salsa.
Cook’s Tip: To prevent the pancake from sticking to the skillet, be sure to spray the skillet liberally with olive oil before pouring on the batter.
Directions:
1. Prepare the vegetables and set aside. Preheat a 10-inch skillet over medium heat.
2. In a small bowl, whisk together the chickpea flour, garlic powder, salt, pepper, baking powder, and optional red pepper flakes.
3. Add the water and whisk well until no clumps remain. I like to whisk it for a good 15 seconds to create lots of air bubbles in the batter.
4. Stir in the chopped green onion and chile peppers.
5. If making one large pancake pour on all of the batter (if making two, use half at a time). Quickly spread batter out all over the pan. Cook for about 5-6 minutes on one side until you can easily slide a pancake spatula under the pancake and it’s firm enough not to break when flipping. Flip pancake carefully and cook for another 5 minutes, until lightly golden.
Cook’s Tip: Make sure you cook all the way through since this pancake takes much longer to cook compared to regular pancakes.
Cook’s Tip: Serve on a large plate and top with desired toppings. Leftovers can be wrapped up and placed in the fridge. Reheat on a skillet until warmed throughout.
Nutrition Information:
Serving Size 1 of 2 small pancakes | Calories 100 calories | Total Fat 1.5 grams
Saturated Fat 0 grams | Sodium 270 milligrams | Total Carbohydrates 15 grams
Fiber 3 grams | Sugar 4 grams | Protein 5 grams
* Nutrition data is approximate and is for informational purposes only.
New Mexican Grande Chickpea Pancakes with Mi Abuelo™ Green Chile Peppers Recipe
New Mexican Grande Chickpea Pancakes with Mi Abuelo Green Chile Peppers Printable PDF
Recipe And Picture Courtesy Of MJ’s Kitchen
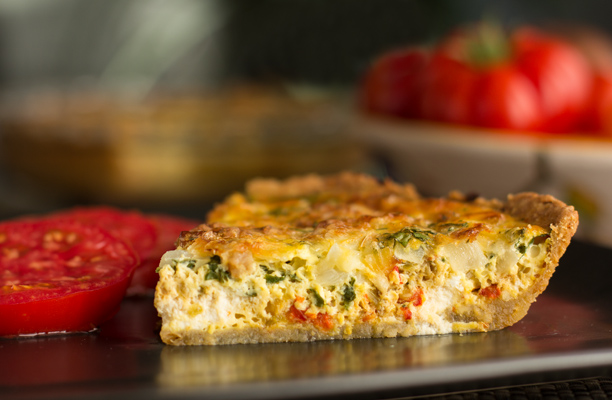

New Mexican Green Chile Quiche With Pinon Crust Using Mi Abuelo™ Green Chile Peppers
7Lightly toast the pinon (pine 1. nuts) in a medium hot skillet.This quiche celebrates the flavors of New Mexico – its chile and pinon. A crunchy pinon crust yields great texture and flavor to a a cheesy, chile quiche.
Prep: 30 Minutes
Cook: 50 Minutes
Servings: 6
Ingredients:
Crust:
• 3 Tbsp. pinon (pine nuts)
• 3/4 cup unbleached AP flour*
• 1/4 cup Spelt flour*
• 1/2 tsp. salt
• 1/4 cup water
• 1/4 cup mild tasting olive oil
• 1/4 Teaspoon fine grain sea salt
• 1/8 Teaspoon black pepper, freshly ground
Quiche:
• 4 ounce slab bacon*, cut into 1/2″ cubes (optional)
• 1/2 medium onion, chopped
• 4 large garlic cloves, minced
• 1/2 cup chopped, roasted fresh red or green chile*, well drained/squeezed to remove liquid
• 2 Tbsp. chopped fresh cilantro*
• 1/2 cup ricotta cheese
• Generous 1/2 cup grated Monterey Jack Cheese
• 4 eggs
• 3/4 cup half & half
• 1/2 cup milk (whole, 2% or skim)
• 1/8 tsp. salt
• 1/2 tsp. mustard powder
Cook’s Tip:
Flours – If you don’t have spelt flour, just use all unbleached AP flour. If you are on a glutenfree diet, then use whatever GF flours you normally use for crusts.
Cook’s Tip:
Making The Crust – Chop the pinon as fine as possible. After mixing the dry ingredients with the liquid, you might find the dough too dry or too wet. This is determined by the types of flours you use and environmental factors. If the dough is too dry, add water 1 Tbsp. at a time until it forms a texture that can be pressed into the pie pan. If too wet, add 1 Tbsp. of flour at a time for the right consistency. (NOTE: The pie crust shown in the instructions is from another quiche and does not have the pinon, but you can see how well it pressed into the pie pan.)
Cook’s Tip:
Bacon – Cubed slab bacon or crumbled thick cut bacon work best. Crumbled thin bacon gets too soggy during the cooking process. You can usually get slab bacon at a butcher shop.
Cook’s Tip:
Roasted Chile – For this green chile quiche I used roasted medium hot chile from The Hatch Chile Store and mild fresh red chile from Sichler Farms. This combination yielded a spicy, but not “hot” quiche. You can use any type of roasted chile or even roasted sweet bell peppers for a very mild, sweet quiche. If your chiles are mild, feel free to add as much as one cup chile. Just be sure that you drain your roasted chile or peppers. Too much moisture leads to a watery quiche.
Cook’s Tip:
Cilantro – If you have the soap gene, then fresh parsley is a good substitute. You could also use dried Mexican oregano, just reduce the amount to 1 tsp.
Directions:
Crust
1. Lightly toast the pinon (pine 1. nuts) in a medium hot skillet.
2. Chop fine. Transfer to a mixing bowl.
3. Add the flours an 3. d salt. Whisk together to combine.
4. Whisk together the water and oil. Pour into flour/nut mixture and stir to combine.*
5. Press into the bottom and along the sides of a pie pan.
5. Set in the refrigerator until ready to pour in the filling.
Filling
1. Preheat oven to 375°F.
2. If you’re adding bacon, heat a small skillet over medium heat. Add the bacon and cook until brown and crispy. Using a slotted spoon, transfer bacon to a papertowel to drain. Pour out all but 1 Tbsp. of the bacon drippings. Reduce heat to medium low. (Skip the next step)
3. If you are not using bacon, heat 1 tbsp. olive oil in a small skillet over medium low heat.
4. Add the onion and garlic to the skillet and sweat until onion is translucent, about 5 minutes. If the garlic starts to brown before the onion is cooked, turn down the heat.
5. Egg/Milk mixture – In a mixing bowl, whisk the eggs. Add the cream, milk, salt, and mustard powder. Whisk until all ingredients are well combined. Set aside.
Assemble – Add the ingredients to the pie crust in the following order:
6. Place dollops of ricotta across the bottom of the crust and spread it out a little.
7. Top with green chile, then onion/garlic mixture, cilantro, bacon, then the grated Jack cheese.
8. Pour the egg/milk mixture into the pie crust.
9. Transfer to preheated oven, and bake quiche for 45 – 50 minutes. At 45 minutes test with a toothpick. Stick a toothpick in the middle. If it comes out clean, the quiche is done. If not, bake for another 5 minutes.
10. Remove from oven and let rest 5 minutes.
11. Serve.
12. A great complement to this quiche is a side of fresh tomato slices, lightly salted and drizzled with good quality olive oil.
New Mexican Green Chile Quiche With Pinon Crust Recipe Using Mi Abuelo™ Green Chile Peppers
New Mexican Green Chile Quiche With Pinon Crust Recipe Using Mi Abuelo™ Green Chile Peppers Printable PDF
Recipe And Picture Courtesy Of MJ’s Kitchen
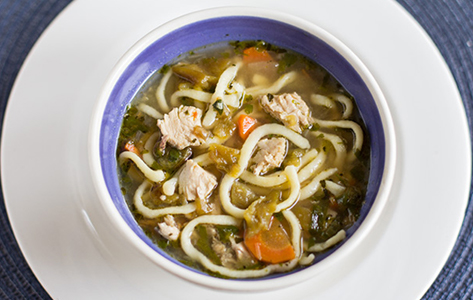

New Mexican Green Chile Chicken Noodle Soup With Roasted Garlic Using Mi Abuelo™ Green Chile Peppers
Lightly toast the pinon (pine 1. nuts) in a medium hot skillet.This quiche celebrates the flavors of New Mexico – its chile and pinon. A crunchy pinon crust yields great texture and flavor to a a cheesy, chile quiche.
Prep: 30 Minutes
Cook: 50 Minutes
Servings: 6
Ingredients:
This recipe can easily be halved by just cutting the ingredients in half.
• 2 Tbsp. olive oil
• 1 medium onion, chopped
• 2 stalks celery, sliced
• 1 large carrot, halved lengthwise, sliced
• 2 heads of roasted garlic*, peeled
• 8 – 9 cups chicken stock/water*, set aside 2 cups
• 1 tsp. dried oregano, crushed
• 1/2 tsp. coarse ground black pepper
salt to taste
• 3 – 4 cups chopped or torn chicken*, cooked or uncooked 1 cup mild to medium roasted green chile*, chopped
• 1/2 cup fresh cilantro, chopped (optional)
• 8 ounces noodles*, cooked al dente
Cook’s Tip:
Flours – If you don’t have spelt flour, just use all unbleached AP flour. If you are on a glutenfree diet, then use whatever GF flours you normally use for crusts.
Cook’s Tip:
If you have leftover soup, store the soup and the noodles separately. This keeps the noodles from getting soggy and falling apart.
Cook’s Tip:
As with any soup, it is always better the next day. So if you have time, make the day before you serve it.
Following are some ideas for spreading out the tasks involved for making this soup.
• Roast a chicken one night, then save the leftover meat for the soup and the bones for the stock.
• Before roasting the chicken, place a couple bulbs of garlic on the roasting rack and roast with the chicken. Or purchase some roasted garlic, or make a separate batch of roasted garlic or roasted garlic/infused oil.
• Use the bones and carcass from the roast chicken to make the chicken stock.
• You could bypass the cooked chicken and stock altogether and do it all at once when you get ready to make the soup. Place 3 – 4 pieces of chicken (skinless breast, thigh, leg, wing) in 6-8 cups of water and cook the chicken. Remove once cooked, let cool, and remove the meat from the bones for the soup. Now you have your stock and your cooked chicken.
• Unless it’s late summer or fall, you probably can’t find any fresh green chile to roast, but, if you are like me, you already have some in the freezer. You might also be able to purchase frozen or canned chile from your local grocer or one of these New Mexico chile suppliers.
• For the noodles, I make my own (more on that below), but you can purchase your favorite fresh or dried noodles or pasta to use in this soup. We like a sturdy noodle that can stand up to the heartiness of this soup.
Directions:
1. In a large soup pot, heat olive oil over medium heat.
2. Sauté onion, celery and carrots for 4 minutes.
3. Add 6 cups of chicken stock and/or water, oregano, pepper, chicken, and chile to the pot.
4. In a blender, add 2 cups stock and the roasted garlic cloves. Blend. Or, using an immersion blender, add to a bowl or pitcher and blend. Add to the soup.
5. Bring soup to a boil, then reduce to a simmer and simmer for 20 minutes. Add more water if needed.
6. Stir in the cilantro. Cook 3 minutes.
7. Taste for salt. Add salt if needed.
8. If you have time, let the soup rest for at least an hour or overnight in the refrigerator to give the flavors time to meld. Reheat while you cook the noodles. If serving immediately, cook the noodles while the soup is cooking.
9. Cook the noodles to al dente. DO NOT add them to the soup pot*.
10. To serve, place about ½ cup noodles to a soup bowl and top with soup. Garnish with more cilantro or green scallions tops, if desired.
New Mexican Green Chile Chicken Noodle Soup With Roasted Garlic Recipe Using Mi Abuelo™ Green Chile Peppers
New Mexican Green Chicken Noodle Soup With Roasted Garlic Recipe Using Mi Abuelo™ Green Chile Peppers Printable PDF
Recipe And Picture Courtesy Of MJ’s Kitchen
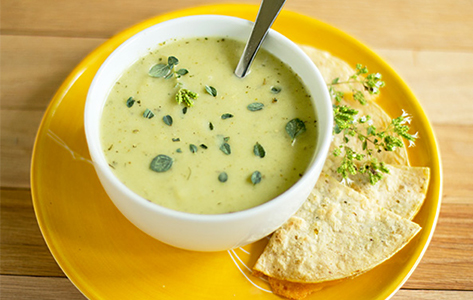

New Mexican Chilled Green Chile Cucumber Soup Recipe Using Mi Abuelo™ Green Chile Peppers
A tried and true chilled cucumber soup recipe with the addition of roasted green chile and a touch of Mexican oregano.
Prep: 20 Minutes
Cook: 40 Minutes
Chill: 12 Hours
Servings: 8
Ingredients:
• 1 Tbsp. olive oil
• 1/2 Tbsp. butter
• 1 cup onion, coarsely chopped
• 6 cups cucumber, peeled, seeded, coarsely chopped
• 2 cups vegetable broth or chicken broth/stock,* canned or homemade
• 2 cups water*
• Juice from half a lime or lemon*
• 1 tsp. fresh dill weed, chopped, or 1/2 tsp. dried dill weed
• 1/4 – 1/2 cup roasted medium green chile,* coarsely chopped
• 1/4 tsp. dried Mexican oregano or regular oregano, crushed
• Salt and ground white pepper, to taste
• 6 – 8 oz. plain Greek yogurt*
• Fresh chives or mint or oregano, chopped
Cook’s Tip:
Flours – If you don’t have spelt flour, just use all unbleached AP flour. If you are on a glutenfree diet, then use whatever GF flours you normally use for crusts.
Cook’s Tip:
If you have leftover soup, store the soup and the noodles separately. This keeps the noodles from getting soggy and falling apart.
Cook’s Tip:
As with any soup, it is always better the next day. So if you have time, make the day before you serve it.
Following are some ideas for spreading out the tasks involved for making this soup.
• Roast a chicken one night, then save the leftover meat for the soup and the bones for the stock.
• Before roasting the chicken, place a couple bulbs of garlic on the roasting rack and roast with the chicken. Or purchase some roasted garlic, or make a separate batch of roasted garlic or roasted garlic/infused oil.
• Use the bones and carcass from the roast chicken to make the chicken stock.
• You could bypass the cooked chicken and stock altogether and do it all at once when you get ready to make the soup. Place 3 – 4 pieces of chicken (skinless breast, thigh, leg, wing) in 6-8 cups of water and cook the chicken. Remove once cooked, let cool, and remove the meat from the bones for the soup. Now you have your stock and your cooked chicken.
• Unless it’s late summer or fall, you probably can’t find any fresh green chile to roast, but, if you are like me, you already have some in the freezer. You might also be able to purchase frozen or canned chile from your local grocer or one of these New Mexico chile suppliers.
• For the noodles, I make my own (more on that below), but you can purchase your favorite fresh or dried noodles or pasta to use in this soup. We like a sturdy noodle that can stand up to the heartiness of this soup.
Directions:
1. Heat oil and butter in a large Dutch oven over medium heat until butter is melted.
2. Add onion. Turn down heat and slowly sweat the onions until translucent.
3. Add cucumber. If you are using dried dill, add it now. Increase heat to medium and cook for 3 minutes, stirring frequently.
4. Add the broth*. Bring to boil over high heat. Reduce heat to a simmer and cook cucumber for 10 to
15 minutes until it starts to become translucent.
5. Add the green chile and stir into soup.
6. Remove the soup from the heat and let cool for at least 15 minutes. It could cool for up to an hour.
7. Using a blender, puree the soup. An immersion blender works great and allows you to blend the soup
in the pot you cooked it in.
8. Add the Mexican oregano and yogurt and blend for about 1 minute or until yogurt has been incorporated into the soup.
9. If the soup is too thick, add a little water to achieve desired thickness. Stir in the lime juice and fresh dill (if you’re using it).
10. Add 2 generous dashes of white pepper. Stir.
11. Taste. Adjust seasoning for the desired amount of salt and pepper. You might also need to add a little more lime juice if the soup tastes a bit flat.
12. Chill overnight.
13. About 30 minutes before serving, remove from the refrigerator.
14. Ladle into small soup bowls. Top with chopped fresh chives, mint, oregano or more dill – your choice.
New Mexican Chilled Green Chile Cucumber Soup Recipe Using Mi Abuelo™ Green Chile Peppers
New Mexican Chilled Green Chile Cucumber Soup Recipe Using Mi Abuelo™ Green Chile Peppers Printable PDF
Recipe And Picture Courtesy Of MJ’s Kitchen
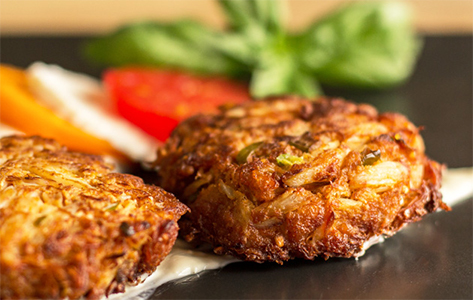

New Mexican Chilled Green Chile Crab Cakes with Horseradish Sauce Using Mi Abuelo™ Green Chile Peppers
A New Mexico twist on the almighty crab cake. Chunks of crab fried up with roasted green chile into a mouthwatering and spicy treat.
Prep: 15 Minutes
Cook: 30 Minutes
Servings: 4 -6 Cakes
Ingredients:
• 1 1/2 cup crab meat, chunky bits
• 1 cup stale bread crumbs, run through blender until coarse*
• 1/4 cup minced onion
• 1/4 cup minced bell pepper, any color
• 1/4 cup roasted green chile, peeled and chopped*
• 1 tsp. dry mustard
• 1/2 tsp. red chile powder
• 1/8 tsp. garlic powder
• Dash of salt
• 1 small egg, beaten lightly
• 1 Tbsp. fresh parsley or cilantro, chopped
• 1/2 tsp. Worcestershire sauce
• Canola oil for frying
• Wedges of lemon or lime
Cook’s Tip:
Breadcrumbs – I usually use the heals of a loaf of bread, but have also used panko breadcrumbs and even 1 cup crushed Ritz crackers. Be sure to blend the bread crumbs to a medium texture. You don’t want the bread crumbs so coarse to where you know there are breadcrumbs in the crab cakes, nor too fine to where it makes the cakes gummy. You want them just right.
Cook’s Tip:
Green Chile – As I admitted with great hesitation earlier, the green chile is actually optional if you don’t like or can’t handle spicy food. However, if you do want a little spice in your crab cakes, then you could add just about any type of chile that you want. Just use your favorite chile pepper – raw or roasted – either way works. Be sure to squeeze out as much moisture as possible before adding to the crab cake mixture.
Cook’s Tip:
Size of the crab cake – The larger and thicker the crab cakes are, the longer it will take them to cook and the harder it is to turn them without having them fall apart. I usually make 5 cakes from this batch which are the perfect size for Bobby and me. You could make smaller cakes (6 to 8) for a dinner party’s appetizers. Just keep an eye on them because they’ll cook pretty fast if they are thinner and smaller.
Cook’s Tip:
The Horseradish Sauce – I’ve serve these green chile crab cakes with lots of different sauces, but the horseradish sauce is our favorite. You don’t have to use much because the cakes have enough flavor of their own. However, a bit of sauce makes a nice finish. Other ideas for a sauce include tartar sauce, a Thousand Island type dressing, remoulade sauce, my catfish dipping sauce, or what my SIL uses – a roasted pepper sauce.
Directions:
1. Mix together all of the ingredients (except for the canola oil and lemon/lime) 1. in a large bowl.
2. Divide the batter to make 4 – 6 crab cakes* and shape cakes, pressing firmly and squeezing out excess liquid. Set in the refrigerator while you make the horseradish sauce and heat up the oil.
3. Make the horseradish sauce (recipe below) and refrigerate. (This step could be done way ahead of time.)
4. Pour about 1/4″ of oil in a skillet and heat over medium heat.
5. When the oil is hot (~325ºF), fry the crab cakes about 4 minutes to a nice brown color, then carefully flip and cook another 4 minutes or until brown. (I like the exterior of my cakes a little crispy so I go for a rich brown.)
6. When done, remove from the oil and place on paper towels or a paper bag to drain.
7. Spread a little horseradish sauce on the plate and top with a crab cake. Squeeze juice from a wedge of lime over the crab cake. Enjoy!
New Mexican Green Chile Crab Cakes With Horseradish Sauce Recipe Using Mi Abuelo™ Green Chile Peppers
New Mexican Green Chile Crab Cakes With Horseradish Sauce Recipe Using Mi Abuelo™ Green Chile Peppers Printable PDF


